Tag: DIY

How to Make Your Own Reusable Cleaning Wipes

Being able to clean a surface, object, or hands quickly is a really handy ability. From sanitizing your kitchen to quickly cleaning up a child, the need to clear away germs quickly and efficiently is ever-present on a homestead. In fact, the more tasks you do for yourself, the more messes there are to clean up along the way. But no homesteader wants to waste materials and packaging on disposable wipes. So, what about reusable cleaning wipes?

Good news; like most things that the disposable culture creates, homesteaders can remake in a sustainable way. With a stack of soft cloths, a plastic bag, and a homemade sanitization mixture you can make your own reusable cleaning wipes of several types. The two most common types are powerful sanitizing wipes and gentle cleansing baby wipes.

Supplies

  • 10+ Soft Square Handkerchiefs

  • Resealable Dispensing Container

  • DIY Sanitizing Solution

  • DIY Cleansing Solution

Choosing Your Soft Square Handkerchiefs

The right handkerchiefs for the job are not your work kerchiefs. Instead, you want a smaller, gauzy cotton kerchief. The more identical kerchiefs you have, the better. Make your own from bolt fabric or buy them in bulk. These kerchiefs should have edges that can remain straight, sturdy enough to be used roughly without fraying, but soft. Be prepared to bleach to maintain color. Baby washcloths may also be an option.

The Right Resealable Container

The next piece of the project is your dispenser. If you have a plastic baby-wipes dispenser, this can work for your homemade wipes as well, but the plastic triangles may rip your soft fabric. Be sure to thoroughly clean and test a reused wipes container before relying on it. A rigid resealing plastic container, like a pencil box, can also be ideal for holding your wipes.

If you wish to make a resealing pouch, try a zip-lock bag as a simple solution. Or you can cut a hole in a zip-bag and use resealing adhesive on another plastic panel to simulate a resealing panel.

Mixing a Sanitizing Solution

Sanitizing solutions used in sanitizing wipes are made in two ways; with bleach or alcohol.  To kill germs, you need at least 60% We suggest 70% alcohol, and a simple isopropyl solution will do. You can buy this at the store or mix it yourself with a ratio of 7-parts alcohol to 3-parts water.

Alternately, you can mix a tablespoon of bleach to a gallon of water. For a disinfecting solution, mix a tablespoon per quart of water or 1/4 cup of bleach per quart of water.

Mixing a Cleansing Solution

A cleansing solution is different. It needs to clean but also moisturize without irritating the skin. The right cleaning solutions can be used on babies and children and used to casually clean your hands many times without causing dryness or rash.

Mix boiled water, almond oil, unscented castile soap, and aloe vera for a soothing and cleansing solution. Other ingredients like witch hazel and vitamin E are equally helpful in these solutions, feel free to experiment with your household preferences.

Fold and Soak Wipes for Quick Use

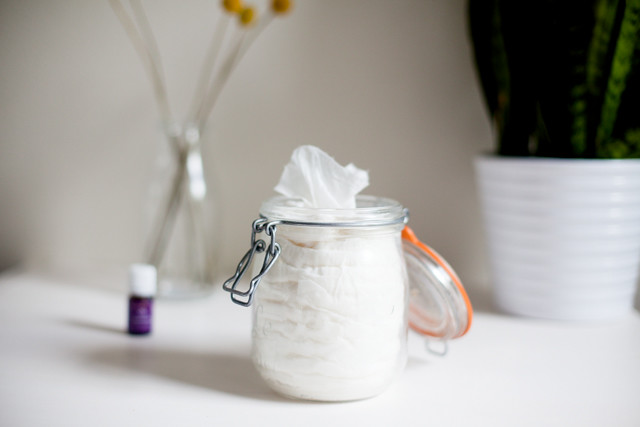
Wash the wipes on a hot cycle and dry them. Then fold each one in a uniform manner that will fit inside your container in a stack. You will likely practice several types of folding until you find the one that grabs and pulls the best for your container solution.

Place the wipes in the chosen container, then soak the cloths from the top-down, pouring your solution evenly to fully soak the cloths from end to end. Allow the solution to soak all the way through and puddle up to an inch around the base of your stack.

As you enjoy the quick use of your wipes, periodically flip your container upside-down to re-soak the cloths if they seem dry when pulled.

When each wipe is used, simply toss it in the hamper, Wash on hot with your towels or other work-cloths and bleach when necessary to eliminate stains. Each time the cloths come out of the dryer, fold them neatly and return them to their container to soak in new solution. In this way, you can benefit from quick, efficient reusable cleaning wipes and the satisfaction of sustainable cleaning products.

Don’t miss these 10 Useful Things to Do with Extra Cardboard.
10 Useful Things to Do with Extra Cardboard

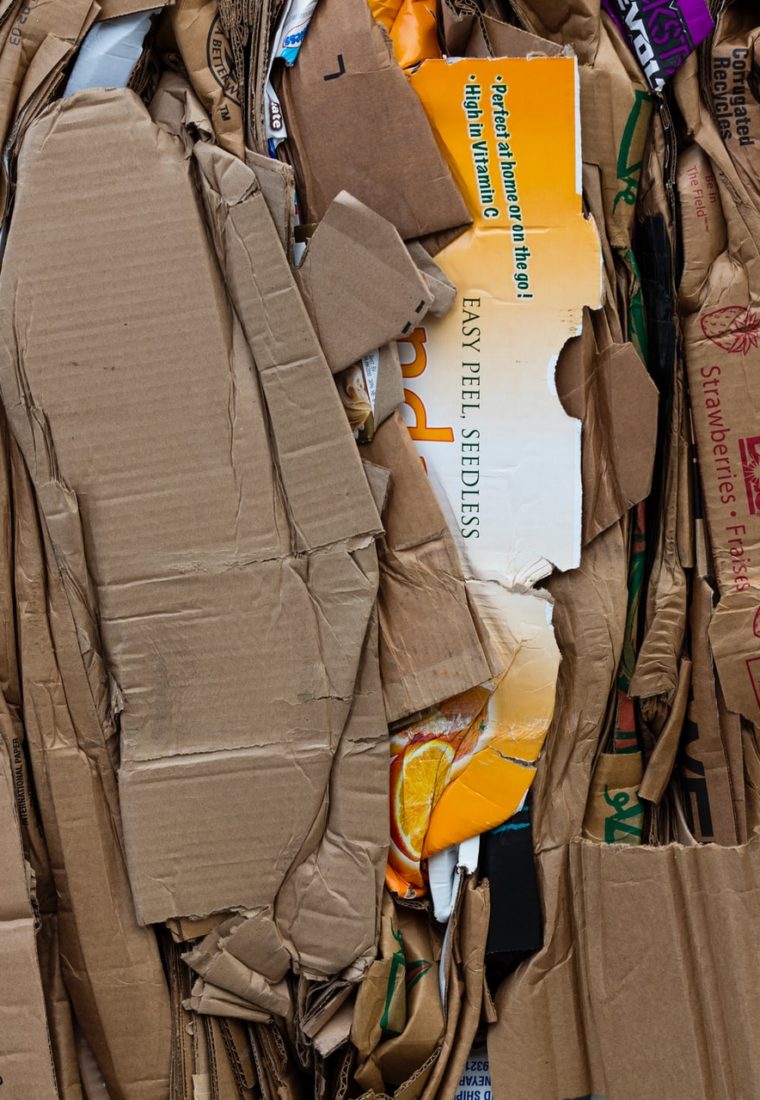
Cardboard is everywhere. This is never more apparent than as a homesteader trying to eliminate waste. Every time you buy a boxed or bulk order, it’s encased in cardboard. Order something delivered? A cardboard box inside a bigger, sturdier cardboard box. If you’ve moved recently, you’re drowning in cardboard or you may have just rediscovered your aging box-hoard from the last move. If you, like many homesteaders, are wondering what on earth to do with all that extra cardboard, we have some ideas. Other than crafting into playhouses and Halloween costumes, here are some actually useful things you can do with extra cardboard:

1. Burn It for Heat

Cardboard burns hot and, if you remove the plastic tape, it’s reasonably clean. It usually burns as a thick-but-light white smoke with very little odor. Cardboard, thick or rolled, is actually excellent for starting logs because it burns hot and lasts for several minutes.

2. DIY Storage Cubes & Totes

Did you know that those cloth storage cubes that are so popular are just wrapped-cardboard? You can use your handicraft skills to construct perfectly sized cardboard storage cubes, then upholster them in fabric for attractive DIY storage. Attach an old belt, and suddenly it’s a tote.

3. Nesting Roosts

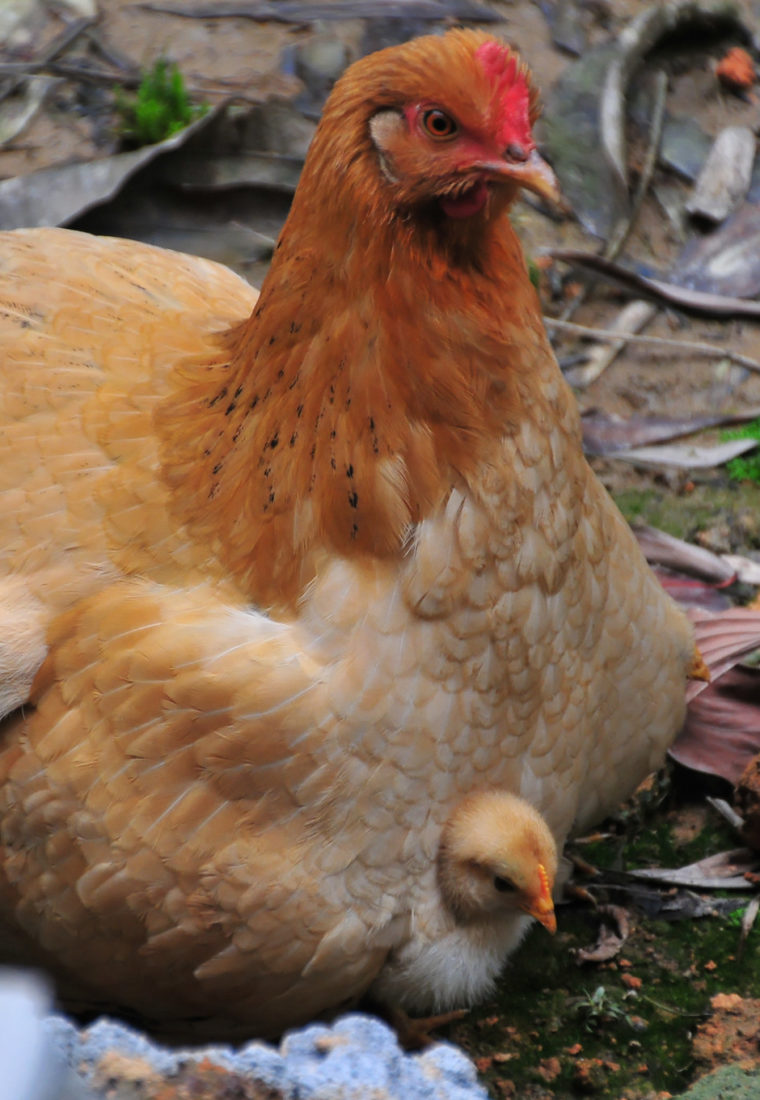
Chickens love cardboard. They can nest in it, climb on it, and peck at it. Cardboard is a perfectly good roost or toy construction material for your homestead chickens. Just keep cardboard items inside the henhouse and out of the rain.

4. DIY Device Stands

Ever wish you had a device stand of the perfect height or angle? Cardboard is surprisingly good for that. Use the old paper slot-construction trick to build yourself stands for laptops, phones, and tablets of any height, shape, or angle that works best for you.

5. Any-Size Picture Frame

Most people keep their photos in digital form these days, but that doesn’t mean you’re out of things to frame. You can use the cardboard-upholstery trick again to make some fantastic handmade picture-frames. Even better, you can hand-size your cardboard frames to fit any flat item you want to frame in the house.

6. Light Shielding

Need to keep light from escaping or entering a room? This happens either as a result of gardening or a family member who needs absolute darkness to sleep. Tacking cardboard over windows is a great way to block almost 100% of the light. Especially when combined with curtains to hide the cardboard from sight.

7. Trays, Organizers, and Pencil Cups

Cardboard also makes great organization containers. You can build shallow trays, open or with sections, to help organize open surfaces. Use compartments or dividers of cardboard to keep drawers and shelves organized. Or use rolls or wrapped-cardboard for a handy pencil cup. Wrapping your cardboard in cloth, contact-paper, or painting it can turn these DIY organizers into decor.

8. Kitty Scratching Post

Cat-owning homesteaders know that keeping your cat’s claws sharp is important for pest control. Your cat needs a scratching post, and they tend to go through them. Cut a large piece of cardboard into a stack of identical pices with a hole in the center so that it forms a wall of cut-cardboard edge. Place the stack over a base-and-pole construction and secure. An easily replaceable scratching post.

9. Gift Tags

Giving is done from the heart, and often decorating a gift is as fun as choosing it. But no need to splurge on little extras like gift tags. Cut the cardboard into tag-shapes, paint or paper, and write the names of loved ones for that special touch.

10. Paper Lanterns

Our last great use for cardboard is to enhance electric lights. Make a cardboard geometric shape around a lamp for cool shadows on the wall or a night-light. Or build a cardboard lantern-frame with colored paper between and place over a soft-glow lightbulb for a paper lantern. Cardboard can turn flashlights, nightlights, and lamp bulbs into a world of cut-out fun or shaded elegance, depending on your style and the mood of the night.

Cardboard can stack up and seem like a nuisance in your zero-waste lifestyle, but it’s really an asset. There are so many surprisingly useful things you can do with extra cardboard. And if you don’t need a chicken roost or organizers, then make a play-fort, a robot-costume, or a stairs-sled for your kids like usual and it will be cardboard-well-spent.

6 Essential Uses for Borax Cleaning Powder

Homesteading is all about finding ways to be done for yourself instead of relying on outside resources. Staples are a big part of this, as in supplies that you can stock up on and use in a variety of different ways. Staples tend to be inexpensive to buy in bulk and essential for a number of DIY homesteading tasks. Flour, salt, and bolts of fabric are all classic staples. But one staple that is often overlooked and undervalued is the humble box of powdered borax. These are 6 Essential Uses for Borax Cleaning Powder.

Borax is one of the most useful (and mild) cleaning products you can stock. In fact, even experienced borax DIY-ers aren’t aware of all the things this simple scrubbing powder can do. If you want to rock your homestead and spend practically nothing on tough cleaning tasks, grab your Borax, and get ready. We’re about to explore the 15 different ways Borax is useful on the homestead.

Actionable Tips for Dealing with a Broody Hen

A hen’s natural instinct is to hatch chicks. Accordingly, you will probably encounter a broody hen at some point. When this happens, she will stop laying and may even become territorial. Learn how to stop a broody hen so that you can continue to gather eggs. Here are some actionable tips for dealing with a broody hen.

1. Remove Her from the Nest

A broody hen must be separated from her eggs. One way to do this is to physically pick her up and move her. Keep in mind that broody hens are often very territorial and may, therefore, bite or peck.  As such, you should use caution when removing a hen from her nest, including wearing gloves and long sleeves.

A hen’s first instincts will be to return to her nest. This means you may need to remove her several times before she finally gets the idea. Avoid letting her sit on the nest again if possible. The more she sits, the more difficult it will be to break the brooding behavior.

2. Block Access to the Nest

Broody hens will leave their nests only to eat and poop. Normally, they will venture from the nest only once each day to do these things. So an alternative is to wait until the hen leaves and then block off her access to the nest.

Nail a board over the entrance to the nesting box. Remove all the straw so that it no longer resembles a nest. This should be enough to discourage your hen from brooding.

3. Encourage her to Roost

Whenever possible, time the hen’s removal until evening.  Once the other chickens have started roosting, place her with them. Odds are that she will not feel comfortable returning to her nest in the dark. However, she may come back the next morning. In that case, you will need to physically remove her again.

4. Use a Wire Cage

Place your hen inside a wire cage that also has a wire bottom. A dog crate will work, provided you remove the bottom and replace it with chicken wire. Ensure the cage is just big enough for your chicken to turn around in. Sit it on wooden or concrete blocks. This will elevate the cage and keep it clean whenever your hen poops.

The only thing inside the cage should be one bowl for food and another for water. Do not place any bedding inside the cage, as it will only encourage brooding behavior. Ensure the cage is in a well-lit area.  Sunlight can provide a rather calming effect that may also help eliminate broodiness.

Keep her inside the cage for around three days or so. After releasing her, watch to see if she attempts to get back on her nest again. If so, you will need to repeat the caging for another day or so.

5. Wait it Out

In most cases, brooding behavior will only last around 21 days. So another alternative is to just wait it out. This may be fine if you are not worried about your hen not laying during that time.

Brooding behavior is sometimes contagious. This means that other chickens may begin brooding if they notice one hen doing so. In that case, you may encounter a vicious cycle of brooding. Keep this in mind before deciding that you will just wait for things to run their course.

6. Take Action to Deal with a Broody Hen

Having a broody hen can be frustrating. However, if you know how to stop a broody hen then you will not be caught off guard by it. Keep this information in mind so that you can take action if you notice one of your hens becoming broody.

Five 5-Gallon Bucket Hacks: Repurpose Old Buckets

Ah, the 5-gallon bucket. It is the old workhorse of your homestead without a doubt. You only need many one or two at any given time, and yet over the years, you can amass so many of them that collect dust in a corner. Yet, the reason you keep all those buckets around is that there might be a day when you need them. They are one of the most useful tools to have. However, if you have a huge stack of 5-gallon buckets sitting in a random corner that needs to have a purpose, there might be some tasks you didn’t even consider them for. Here are Five 5-Gallon Bucket Hacks:

Chicken Feeder or Waterer

diyerlabs.com

If you drill holes near the bottom edge of your five-gallon bucket and set it in a tray, you have yourself a perfect chicken feeder. You can also use it as a waterer if you get a deeper tray. The nice thing is that they are both cheap to make and hold way more than your cheapest store-bought options.

If you keep the lid on the top, it helps keep the water and food clean and secure as well, though a piece of spare wood can work just as well as a lid.

Furniture

designsponge.com

Certainly, there is going to be some fight from anyone you live with if you try to bring a five-gallon bucket in from the barn to the living room to be your new footrest or stool. However, all it needs is a little dose of style. You upholstery a couch to change its appearance, and you can do the same with a five-gallon bucket. You simply cover the exterior with fabric or even paint and add a nice cushion on top. It works as a nice stool or ottoman, and the guests will never even know what it truly is.

Strawberry Bed

homemadefoodjunkie.com

These buckets make for great portable gardens, but that is obvious. However, using them for strawberries may be less obvious. If you add holes to the sides, you can grow quite a few strawberry plants in one bucket. Leave it on the ground or hang it in the sun and you will have an easy to harvest, booming berry patch. Be sure to drill some holes in the bottom for drainage, though.

Nesting Boxes

meyerhatchery.com

This one is super easy. Turn the bucket on its side, and stuff it with hay, then place it in your coop. This provides a desirable, sheltered space in your chicken coop for your hens to lay. No need to build boxes and this option is very every to clean when the time comes.

Composting Bin

faithfulfarmwife.com

Five-gallon buckets can make the perfect composting bin for both inside and outside the home. if you don’t yet generate a lot of food waste or other compost materials – or have a smaller homestead – you don’t need to build or buy a huge composting tumbler quite yet. However, you can start building your compost pile inside a five-gallon bucket. Just drill holes in the bottom, put it somewhere it is at least partly sunny, and shake every few days. If you don’t want to have to water it occasionally, you may also consider one or two holes drilled in the top to let some rain in as well since good compost require both air and water.

It is also worth noting a five-gallon bucket in the kitchen can be a big boon too for larger homestead. They seal well, the smell doesn’t seep out through the plastic, and it has a lot of room for food scraps so you don’t have to make the trip to your already established compost pile as often.

P.S. Amazon has a ton of 5-gallon buckets to choose from if you don’t have any old ones laying around.

If you liked these 5-Gallon Bucket Hacks, don’t miss these 50 DIY Hacks That Will Make You Feel Like a Complete Genius.

DIY Hand Sanitizer with Essential Oils and CBD

Good news, hand sanitizer is pretty easy to make. All it takes is a few key ingredients combined with the right amounts and voila, hand sanitizer. Besides, the hand sanitizer you make will probably be better for your skin than the store-bought products with way more chemicals. Since hand sanitizer is sold out everywhere these days here is a quick tutorial for DIY Hand Sanitizer with CBD and Essential Oils:


Here are the ingredients and steps for the DIY Hand Sanitizer with CBD and Essential Oils.

Hand Sanitizer Ingredients:

  • 4 oz spray bottle: reuse old sanitizer bottles if you have them
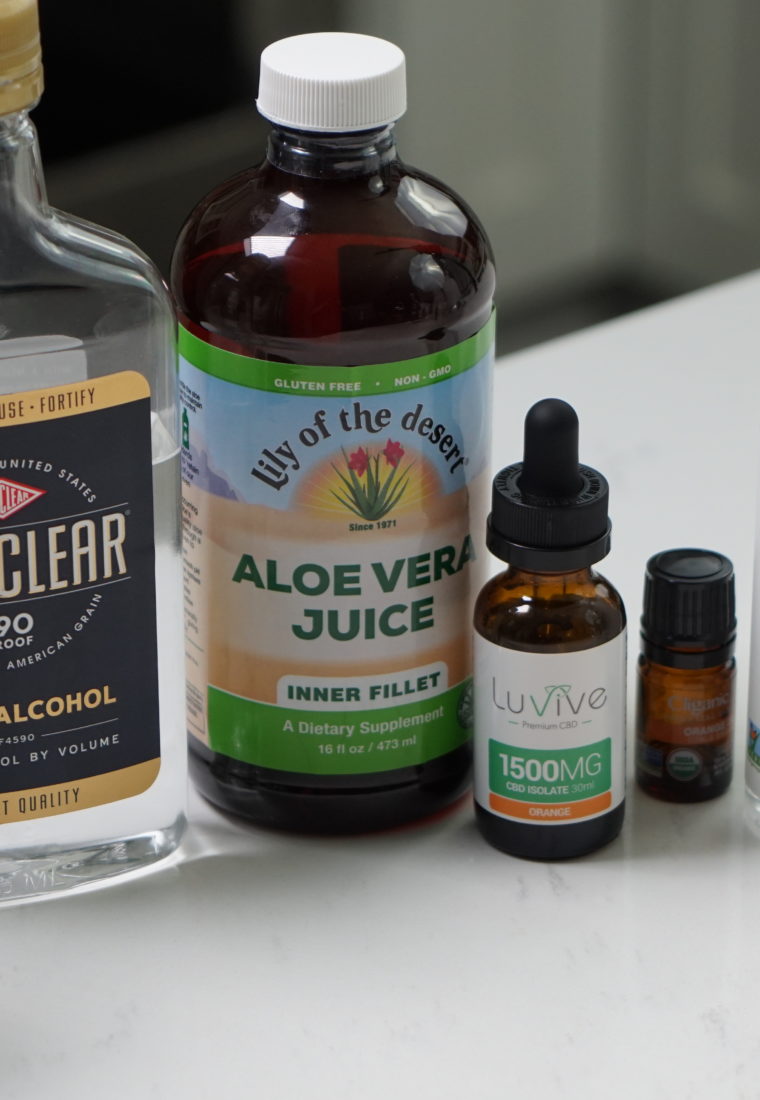
  • Everclear alcohol: alcohol must be at least 150 proof
  • Aloe vera juice: helps moisturize dry skin
  • CBD tincture: aids the immune system (we like Diamond CBD Oils)
  • Orange essential oil: orange blossom essential oil or your personal choice of scent
  • Vegetable glycerin: helps keep skin smooth and soft

Steps:

  1. Fill 4oz spray bottle 2/3 of the way to the top with Everclear Alcohol
  2. Add in 3 tablespoons of aloe vera juice
  3. Drop-in 1 full dropper of CBD
  4. Add 5 to 6 drops of essential oil
  5. Add 3 tablespoons of vegetable glycerin
  6. Screw the top back on the 4 oz spray bottle and shake well before using!

Thanks for checking out this DIY Hand Sanitizer with CBD and Essential Oils post! Also, don’t miss these supplies you want to have enough of while quarantined.

Easy DIY Hand Sanitizer Recipe

One thing that we try and keep around the house is a good hand sanitizer. Second, to a good old fashion hand-washing, hand sanitizer is a perfect way to keep your hands clean when you are on the go… and trying to avoid germs, at all costs.

Unfortunately, at least in my town, it is all but impossible to find any hand sanitizer on the shelves right now. As the Coronavirus spreads into communities, and hand sanitizer slowly makes its way into the hands of price gougers, I thought it would be a wonderful time to share my personal hand sanitizer recipe.

The ingredients are simple, and many of you will have most of them around your home already. I am meaning the essential oils and not the grain alcohol, but who am I to judge?

So without further adieu, if you’re finding yourself in a situation where you need hand sanitizer and do not have it, get to work. And if you can make enough to share with your friends, they will truly appreciate it especially if they have little ones running around.

DIY Hand Sanitizer

DIY Hand Sanitizer

You will need the following:

  1. Preferably in an empty pump bottle, but any glass container will do; add about 30 drops of tea tree oil. Tea tree oil has a long list of health benefits and sanitizing properties.
  2. Add in about 5 to 10 drops of lavender essential oil. Lavender also has some wonderful properties, but personally, I think it smells good and can be a very calming scent.
  3. Okay, so here’s the fun part, add in 3 ounces of a high proof vodka. I’m not talking the good stuff, I’m talking the college party stuff. Don’t skimp because the alcohol volume needs to be high, go with Everclear, for a safe bet.
  4. Next you want to go with about an ounce of aloe vera gel. This is a great moisturizer for your hands and a great way to mix in all the ingredients without them becoming too harsh. If you want to make a spray just substitute witch hazel for the aloe vera gel and you are good to go.
  5. Lastly I would say to add about a quarter of a teaspoon of vitamin E oil, as this will help moisturize and soften your hands.

We all know how important having clean hands is to keep you healthy and to keep germs from being spread.

With hand sanitizer being harder and harder to find this is a great alternative that is just as effective when you are in a pinch.

Homemade Cleaning Solutions for Every Part of your Homestead

Some think that you can’t have a truly “clean” environment when you live a homesteading lifestyle. However, natural cleaning remedies have just as many antibacterial properties as their man-made counterparts. They also don’t have any of the harsh chemicals, making them safer for both humans and animals. Making your own cleaners from home saves you a lot of money and it doesn’t even take much effort! Here’s how to clean each area of your home with Homemade Cleaning Solutions made from multi-purpose ingredients already in your pantry. 

Kitchen

Homesteading means a lot of preparing your own meals. Because of this, you want to make sure that your kitchen surfaces are as clean as possible. Making food on dirty countertops and cutting boards is one of the most common causes of food poisoning. Fortunately, you don’t need any harsh store-bought cleaners to kill these germs.

White vinegar is the perfect substance to use for disinfecting since it contains acetic acid. It can also cut through grease and grime that’s been sitting on kitchen surfaces for too long. Wiping down your counters with a water-vinegar mixture will kill any bacteria. To make them smell nice and fresh, you can also add a few drops of your favorite essential oil to the mix.

Dishes

Clean dishes and silverware are just as important as clean counters, if not more so! If you have a dishwasher, you can use your white vinegar/water mixture in place of regular dish soap. All you need are a couple of drops in the detergent holder. Next, fill it up most of the way with baking soda. Fill it the rest of the way with salt to prevent hard water build-up.

Don’t forget to clean the dishwasher itself once in a while! Place a bowl filled with vinegar on the top rack for one cycle. Next, mix one cup of baking soda with a drink mix or essential oil. This will make your dishwasher smell fresh while eliminating any lingering germs from your dishes.

Bathroom

The bathroom is probably the most notoriously dirty place in your household, so it’s important to keep it clean! To freshen up your shower, fill a spray bottle with baking soda, water, ammonia, and white vinegar. Let it sit for at least five minutes, then wipe the foam away with a wet towel.

Cleaning the toilet is also a breeze with natural cleaners. All you need to do is pour one cup of baking soda into the bowel and let it sit for an hour. Next, add a cup of vinegar. Let it work for a few more minutes, flush, and you’re done!

Floors

No matter what kind of floor you have, a natural cleaner can get the job done. For tiled floors, spray a vinegar-water mixture over the floor. Next, mix baking soda with water to create a paste for the grout. A thorough scrubbing will get rid of any mold or mildew.

For light carpet stains, dissolve two tablespoons of salt in white vinegar. If it’s a tough stain, you can also add a tablespoon of cornstarch. Always apply the mixture to the stain with a damp cloth and never pour it directly onto the carpet. Wooden floors are the easiest to clean: all you need is warm water and white vinegar!

Windows

Want the world to be able to see your newly spic-and-span house? Finish up by polishing those windows! For this, you’ll need a quarter cup each of rubbing alcohol and apple cider vinegar. Add two cups of hot water and a tablespoon of cornstarch.

Pour the mixture into a spray bottle and apply it to your windows. You’ll be able to wipe them down without any streaks and restore their original shine! 

If you liked these Homemade Cleaning Solutions for Every Part of your Homestead be sure to check out these Essential Multi-Purpose Ingredients to Always Stock.

How To Start a Homestead While Living in the City

There is a misconception that you need to live out in the country on acres of land in order to start homesteading. However, you don’t need to move away from the city to benefit from homesteading. Here are some simple steps that you can take to start your homestead while living in an urban environment. Read on for How To Start a Homestead While Living in the City.

Join a Community Garden, Co-Op, or Group

Even in the most densely populated cities, there are community groups of like-minded individuals who have an interest in homesteading. Complete a basic Internet search to see what kinds of community gardens, co-ops or homesteading groups already exist in your city. You may be surprised to find that membership only requires a volunteer commitment or a small fee. If you discover that there isn’t a community garden in your area, you can start one yourself.

Research City Laws

Every city is unique. However, many cities allow for rooftop gardens. Research the legalities of homesteading in your particular city. You may find that you are able to own chickens, start a rooftop garden, or participate in other forms of homesteading that you may not have realized.

Start Small

You can always start your homesteading journey in small ways. You do not need to start a giant vegetable garden and orchard or raise a dozen chickens to be a homesteader. If none of these options are available to you, there are other homesteading skills that you can start learning. This includes canning and pickling vegetables and fruits you can purchase from a local farmers market, learning to make and mend your own clothes, and creating your own varieties of soap.

You can start homesteading no matter where you live, even in urban environments. Whether you join a community garden or find other homesteading skills to learn, you can reap the benefits. If you decide to move somewhere else, you can often take your small container gardens and pantry staples with you.

50 DIY Hacks That Will Make You Feel Like a Complete Genius

Your life isn’t going to become neater, simpler, or more organized by itself. But lucky for you, there are some simple do-it-yourself solutions for almost every daily problem. From removing marks from clothes and carpeting to cleaning your air conditioner, there’s nothing you can’t handle yourself. So, read on to learn 50 DIY hacks you’ll want to share with everyone. You’ll feel like a complete genius.

1. Remove Deodorant Stains

Do you have an unsightly deodorant mark on your clothes? Instead of rubbing your garment with a standard cloth and risk pilling, grab a pair of pantyhose. Just gently rub the deodorant mark and watch it disappear with ease.

2. Get Rid of Sticker Residue

Don’t you hate it when you peel a label off a jar only to find paper and residue left behind? Using a cotton pad and some cooking oil, rub the residue and let it sit for a few minutes. Once the oil has sunk in, it’ll wipe away easily.

12 of the Easiest Thanksgiving Decorations to Make

When your Thanksgiving table is already filled with food, it only makes sense to decorate it with even more edible items. Looking for more edible decorations? Check out these too-cute turkey treats for the whole family.

1. Acorn Donut Holes

If these don’t get you pumped for fall then nothing will.

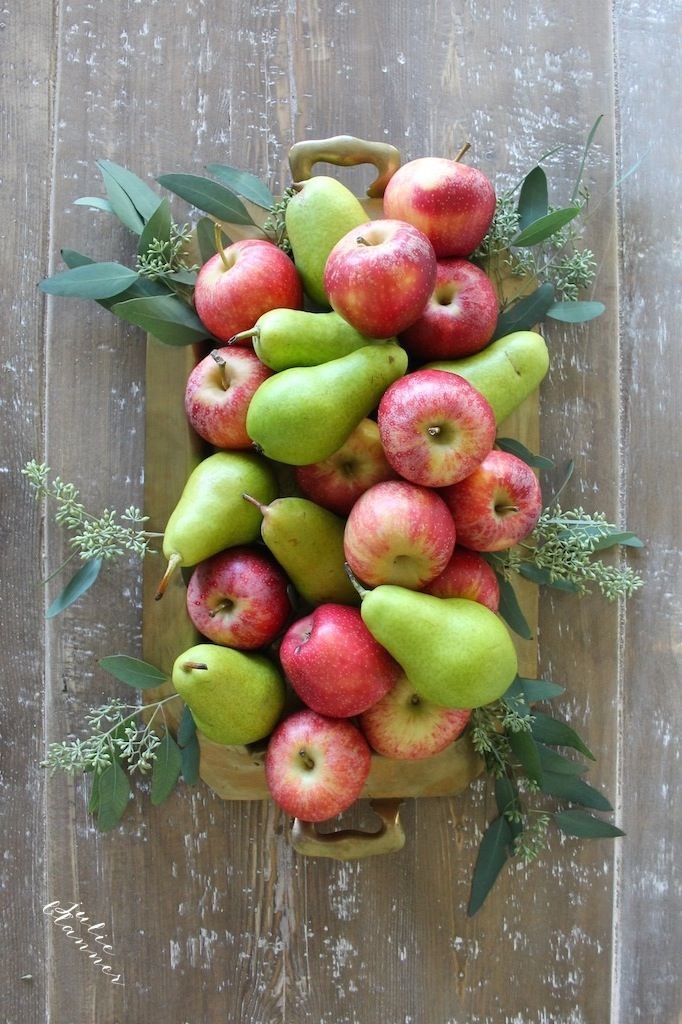
2. Fall Centerpiece

Use apples and pears to make a gorgeous fall centerpiece that guests can snack on while they wait for dinner.

3. Leaf Cookies

Simple and cute all together! You can’t go wrong with making some of these this holiday season!

4. Apple Place Cards

Use a fall fruit you probably already have in the house to help guests find their place at the Thanksgiving table.

5. Clove Studded Pears

Make a two-ingredient centerpiece with cloves and pears or create individual place cards with guest’s initials

6. Pastry Place Cards

Give Thanksgiving attendees a taste of dessert before dinner with these adorable apple-filled pastry place cards.

7. Gilded Pears

Okay, so you can’t actually eat these place cards, but this is a great way to use up extra fruit that you didn’t end up needing for pies.

8. Tepee Place Card Holders

Decorate the dessert table with these sweet cupcakes that the kids will probably appreciate more than pie.

9. Oreo Turkey

Kids will love helping to make these cute turkey place cards, and everyone will love eating them.

10. Teepee Cake Bites

The kid’s table won’t care about pie when they realize these decorative treats are made of cake.

11. Sugared Fruits and Vegetables

Sugared fruits are easy to execute and add an extra special touch to your Thanksgiving table.

12. Chocolate Covered Pretzels in a Turkey Jar

There’s chocolate involved, so you know he won’t stay whole long.

With these 12 ideas, your Thanksgiving table will be memorable for all your guests. Enjoy the day with these creative additions to your holiday decor.

60 Designers Who Had One Job and Still Failed

Being an engineer or architect is not an easy job. Both require years of school and training. Any mistake can live on for all to see and marvel at. Perhaps the designers responsible for these mistakes slept through class or were having a really…..really bad day. Either way, we have compiled some of the best fails created by individuals determined to leave their mark on the world.

1. Being Handicapped In Cabo San Lucas Is Apparently An Extreme Sport

2. It’s Even More Fascinating When This Happens In A Design School

25 Sustainable DIY Garden Projects

Everybody loves relaxing in a beautiful garden, with flowers and plants that enhance the natural scenery of the outdoors.

While the best public gardens look perfectly manicured and well maintained, that doesn’t mean the home gardener can’t create their own backyard oasis.

In fact, there are plenty of easy and affordable ways to make your garden a uniquely gorgeous and inviting space. Read on for 25 sustainable do-it-yourself garden projects.

Pallet Wood Garden Walkway

 1001 Pallets

Make the short journey from your back porch to the yard look pretty with slats of pallet wood.

The wood used for pallets is typically hardwood and can handle the outdoor elements quite well.

Simply lay down the pallet wood on top of a dirt path until you’ve connected the porch to the yard.

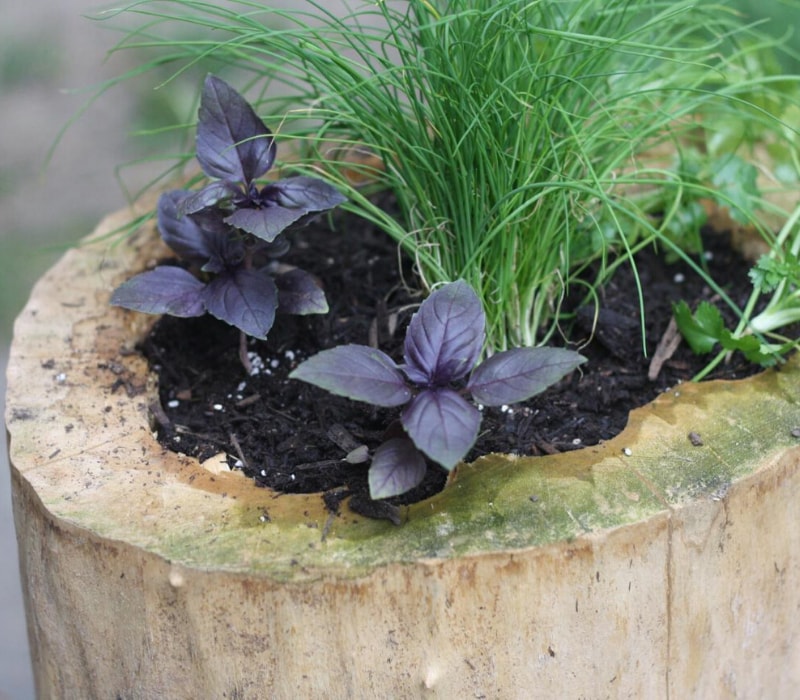
Tree Trunk Planters

DIY Network

If you have a tree trunk or a fallen tree in your yard, don’t just chop it up and put it in the wood chipper.

Re-use it as a natural planter for some pretty flowers. It’s an easy and clever way to add color to your garden

15 of the Best DIY Projects to Revive Outdated Items

There are many items in the house that you would probably love to restore. Most people hold on to a lot of vintage and sentimental things throughout their lives. And although you may not be able to get rid of them completely, you can make them look almost new. So, here are 15 of the best DIY projects to revive outdated items.

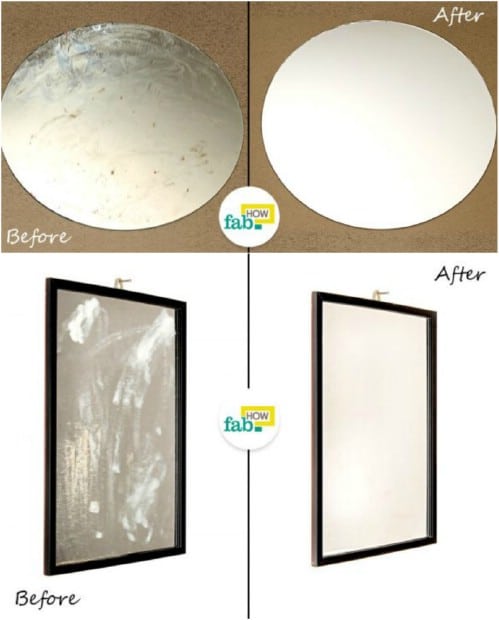
1. Easy DIY Mirror Restore

If you have really old or antique mirrors, tossing them is simply not an option. Instead of tossing that old mirror, you can restore it quickly and easily and give it back that like-new look. You just mix up a vinegar solution to clean the cloud from your mirror and then tackle any wood or paint fixes that the frame may need.


2. Stain Remover for Baby Clothes

If you’ve got some old baby clothes that are stained or yellowed, there is a quick fix for that and it leaves that clothing looking good as new. OxiClean works like a charm to remove those yellow stains and make that clothing wearable once again.

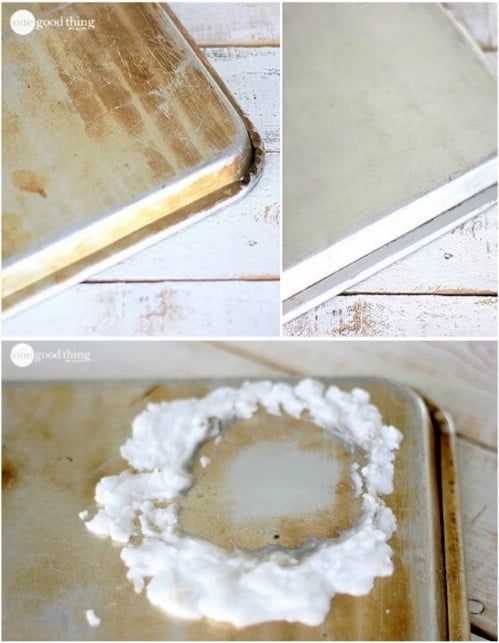
3. Baking Sheet Restore

This little trick works with cookie sheets, pizza pans and cake pans. A mixture of baking soda and peroxide will scrub that greasy, dingy mess right off and leave those pans shining like new.

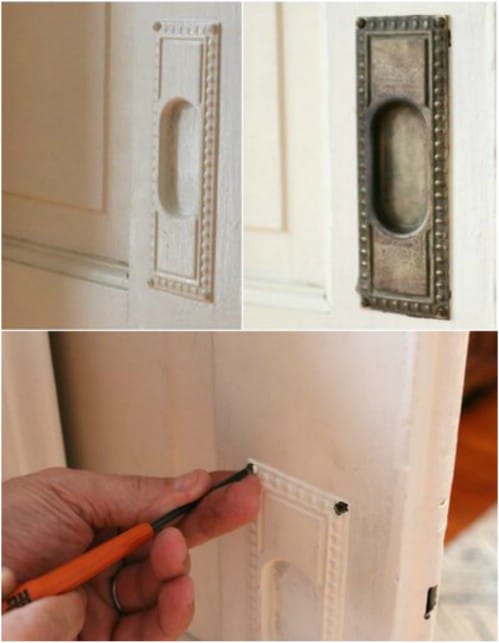
4. Brass Restore

You don’t have to replace them just because they have lost their gleam. Instead, try cleaning them by placing them in a slow cooker and adding dish soap. This works wonderfully to remove paint; just in case someone has tried to paint over them to make them look new.

5. Cast Iron Skillet Renew

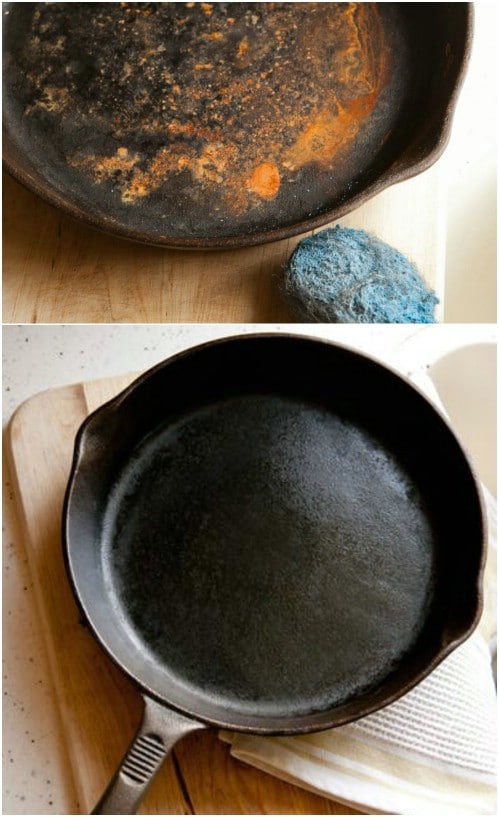
You don’t want to cook in a rusty pan, right? And throwing those skillets out is out of the question because they can be very expensive to replace. The next time your cast iron skillet gets rusty, try this trick of scrubbing the rust away with steel wool and then re-seasoning it with vegetable oil.

DIY Pine & Sage Beard Oil

My husband has a wildly full beard (hallelujah) and he needs to condition it quite often. Here’s the problem though, most beard creams are thick and almost feel waxy.

He wanted something that would condition without making his face itch!!! So… I came up with a beard oil that smells like a mountain man living in pine tree surrounded shack that cares about personal hygiene.

Enticing?

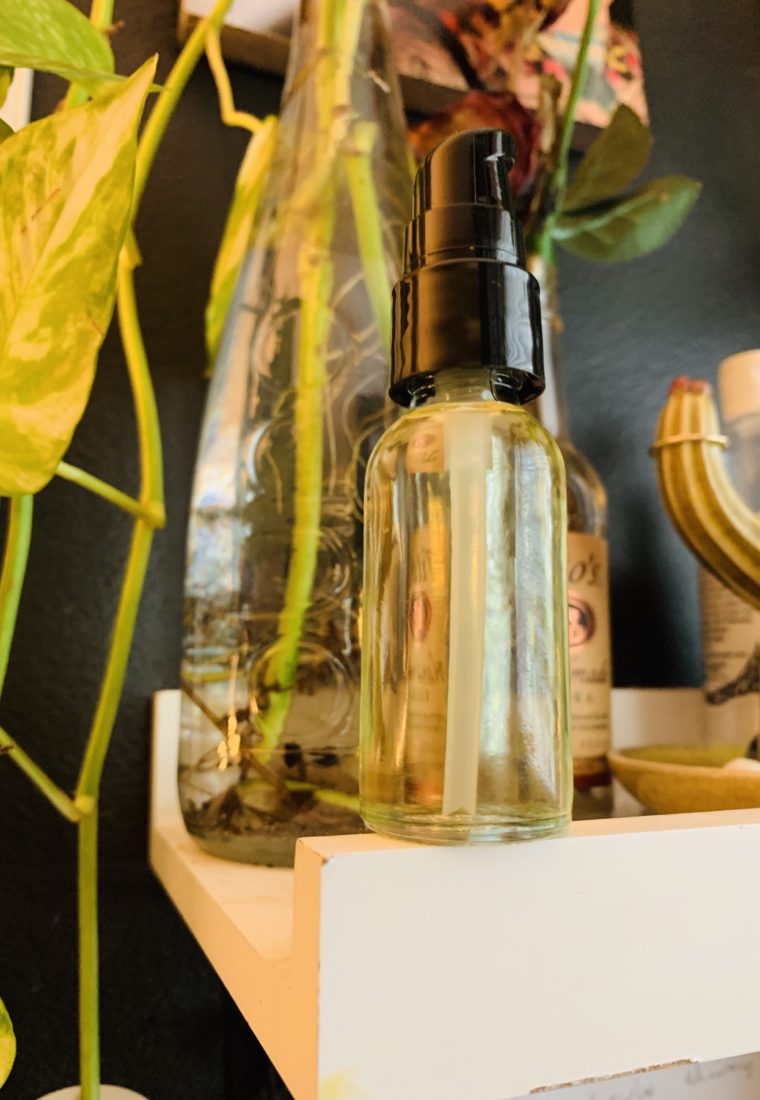
Here ya go: JOJOBA OIL + PINE ESSENTIAL OIL + CLARY SAGE ESSENTIAL OIL.

As for how much of each, I did half a bottle of jojoba and the rest EO’s. It is the perfect consistency and works and smells good.

DIY Face Paint for a Healthier Halloween

In order to make sure you stay healthy while participating in the fun, Sophia Ruan Gushee, author of A-to-Z of D-Toxing: The Ultimate Guide To Reducing Our Toxic Exposures, has created for us, the ultimate recipe for nontoxic DIY face paint that the whole family can have fun making together!

There are many dangerous toxicants found in conventional paints, including lead, nickel, cobalt, and chromium. This recipe is quick, easy, and a great alternative to the common varieties out there:

Ingredients

  • 1 ½ tbsp cornstarch
  • ¼ tbsp all purpose flour
  • 2 tbsp honey
  • ½ tbsp water
  • Natural food color (seek nontoxic products on Amazon, or use household food items that can act as natural dyes)
  1. Mix the cornstarch and flour in a bowl. Add the honey and water to your mixture. It should create a thick, gluey substance that resembles a paste. If the paint is too thin, add more cornstarch and flour. If too thick, add extra water.
  1. Divide the mixture into separate bowls, and add your coloring. For example, you can use turmeric for yellow, and paprika for red.
  1. The paint comes out a bit more thick and gooey than conventional face paints, but the colors come out beautifully and stay on for hours.
  1. While the paint dries well, the honey component makes the paint slightly sticky to the touch. Avoid touching the paint after it is applied.