Tag: Gardening

Environmentally Friendly Gardening: 3 Must-Haves

Do you want to be more sustainable at your homestead, especially in your garden?  It is very easy to get discouraged when our projects don’t work as quickly as we want. Adding these few items into the rhythm of your daily life will encourage sustainability for the environmentally friendly gardener. Check out these 3 Must-Haves to improve your Environmentally Friendly Gardening:

Cute bin, Dirty business

This 1.3-gallon compost bin on Amazon is not only affordable but has a five-star rating.  It will most definitely accommodate the needs of an average size family’s food waste.  This bin will add a classy touch to your kitchen counter because it made of stainless steel.  Additionally, the activated-charcoal filter keeps your house from smelling like what you’re collecting.  If you treat the filter well and clean it, it should treat you well up to six months.

Papa Bear Bin

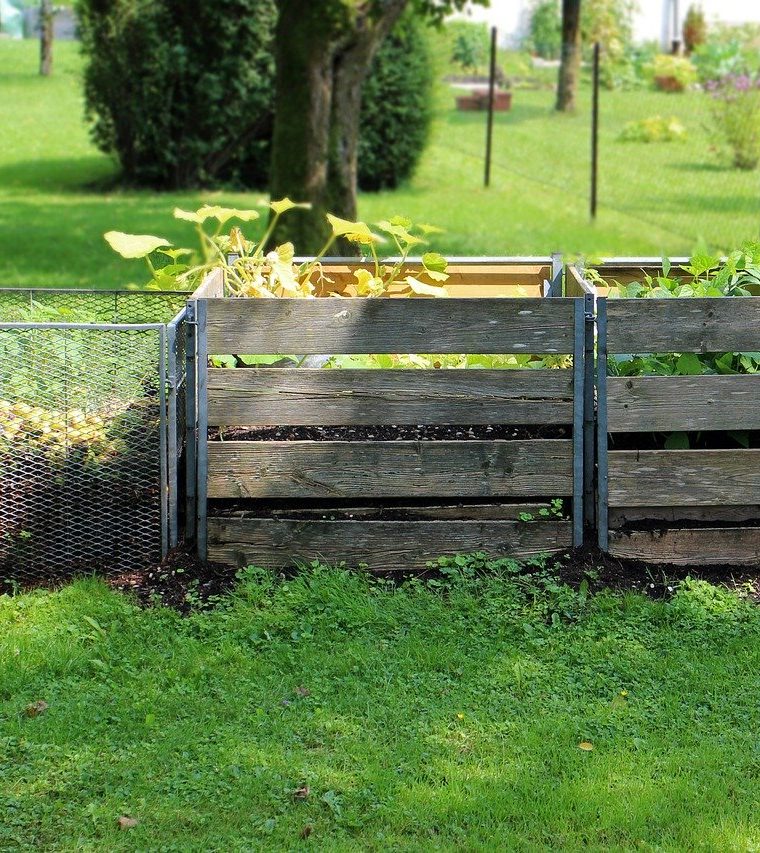
If you have a compost bin in the house, you best have a compost bin outside.  Your indoor compost bucket is merely the middle-man, transporting food waste to the larger container before it makes its way into the garden.  Several outdoor composting options are available for environmentally friendly gardeners.  This sizable container is more budget-friendly and gets the job done, while this option offers a nice price and allows you to turn the compost without having to employ much elbow grease.

The Magic Ingredient, Water

To tie it all nicely together, what would compost be without cool, clean water to help the nutrients infiltrate the soil?  Unless you live where the rain falls at perfect intervals and your garden never needs watering, this sensible rain barrel should come in handy.  Fifty gallons will help you water a small garden until the next rain event.

In your homesteading quest for zero-waste glory, each of these products will assist you in your mission.  Starting in your kitchen, food waste makes its way to your tiny bin. Then from the tiny bin to the papa bear bin and ultimately to those hungry baby plants in the garden, only to be watered in with the heavenly rain you have collected.

Happy composting! And we hope these 3 Must-Haves to improve your Environmentally Friendly Gardening gave you some great new ideas!
4 of the Most Useful Homesteading Skills to Learn This Winter

Winter is the perfect time to learn new homesteading skills. Cold temperatures and limited daylight keep most people inside for much of the day. So learning new homesteading skills is a great way to benefit from those extra indoor hours. Read on to learn four basic skills that can help improve your homesteading life. 

1. Cooking

If you haven’t already learned to cook from scratch, it’s an essential skill to master. You need to know the basics of scratch cooking to turn next season’s garden harvest into delicious meals. More experienced cooks could learn additional skills like how to bake or how to turn leftovers into new meals.

The best way to learn is to take a cooking class, but you can also get some basic cookbooks and just jump right in, as well. Choose a couple of recipes you would like to make, gather your ingredients and read through the entire recipe before starting. 

2. Fiber Arts

Do your homestead dreams include making your own clothes, creating beautiful gifts, or raising fiber animals? Learning to sew, knit, or crochet is the first step toward turning those dreams into reality. Taking a local class gives you a chance to learn a new skill and make new friends. If there isn’t a convenient class, it’s not hard to find online tutorials for these skills.

3. Gardening

Unless you’re indoor gardening, you’ll have to wait until spring to put into practice what you learn about gardening during winter. New gardeners may want to learn how to:

  • Plant a raised bed
  • Choose plants for their growing zone
  • Decide where to plant garden beds
  • Deter pests
  • Create a compost pile

For those of you who are familiar with the gardening basics, you may be interested in learning to build something that will enhance your gardens, like a tomato trellis or simple greenhouse.

4. Woodworking

For those who didn’t take shop class in high school, even basic woodworking skills may seem intimidating. But you needn’t be afraid. Woodworking isn’t difficult once you learn the basics, like working with the grain and how humidity affects wood. Learning to cut properly and safely comes next. With a little information, you’ll be cutting perfect miter joints before spring arrives.

These four basic homesteading skills will take you a long way in your journey towards self-sufficiency. Whether you learn one skill or all of them, each is a great way to spend those cold winter months indoors. 

7 Smart Strategies for Planning Your Spring Garden This Winter

Planting your spring garden each year can be fun and rewarding. But, what do you do after you harvest? The winter months don’t have to be idle ones for gardeners. Here’s what you can do to prepare for spring.

1. Start Small

New gardeners often have dreams of turning their entire yard into a lush paradise. It’s great to dream big, but wise to start small. A large garden can be overwhelming and exhausting for beginners. You will be busy and learning a lot just by planting one raised bed.

But hold on to your dream. With hard work, one day your yard will be the oasis you’ve dreamed of for so long. By planting a smaller spring garden, you’ll have more time to learn what grows best in your area. You’ll also find out what you enjoy growing, too. 

2. Know Your Planting Zone

Your growing zone, also called a planting zone, helps you determine which plants grow the best in your area and when to plant them. Your local gardening center can tell what zone you’re in. Or you could enter your zip code in the USDA’s planting hardiness zone map.

3. Request Seed Catalogs

While you can look at seed catalogs online, but print catalogs make the process easier. If you’re interested in heirloom seeds or organic seeds, there are specialty catalogs for them. Next year, you can plant the seeds you’ve dried and saved from the plants in this year’s garden.  

4. Set a Budget

You can avoid overspending by setting a budget before the seed catalogs arrive. Some great ways to save money on your garden is to go to a seed swap or seed library. Save your seeds at the end of each growing season to plant or swap. Check your local high school’s agricultural department for plant sales. 

5. Inspect Your Tools

Winter is the perfect time to clean, repair and replace broken garden tools. Beginners who don’t have tools may want to purchase a few basic tools like a shovel, a trowel and a garden hose. You can always get more tools when you have a need for them.

6. Choose What to Grow

There’s no reason to grow food that you and your family don’t enjoy eating. It’s a waste of time, effort and money. So make a list of your family’s favorite fruits and vegetables. Find out which ones grow best in your area according to your planting zone. That makes it much easier to choose what to grow each year. 

7. Decide Where to Plant

How much your space will your plants need when they’re fully grown? How much sun or shade will they need? These are questions to consider when you’re trying to figure out where to plant. Some gardeners find it helpful to draw their yard on graph paper. Each square represents one square foot. Then they sketch out where they’re going to plant.

Winter is the perfect time to think about your spring garden. When the warmer temperatures of spring arrive, you’ll be ready to hit the ground digging.

25 Sustainable DIY Garden Projects

Everybody loves relaxing in a beautiful garden, with flowers and plants that enhance the natural scenery of the outdoors.

While the best public gardens look perfectly manicured and well maintained, that doesn’t mean the home gardener can’t create their own backyard oasis.

In fact, there are plenty of easy and affordable ways to make your garden a uniquely gorgeous and inviting space. Read on for 25 sustainable do-it-yourself garden projects.

Pallet Wood Garden Walkway

 1001 Pallets

Make the short journey from your back porch to the yard look pretty with slats of pallet wood.

The wood used for pallets is typically hardwood and can handle the outdoor elements quite well.

Simply lay down the pallet wood on top of a dirt path until you’ve connected the porch to the yard.

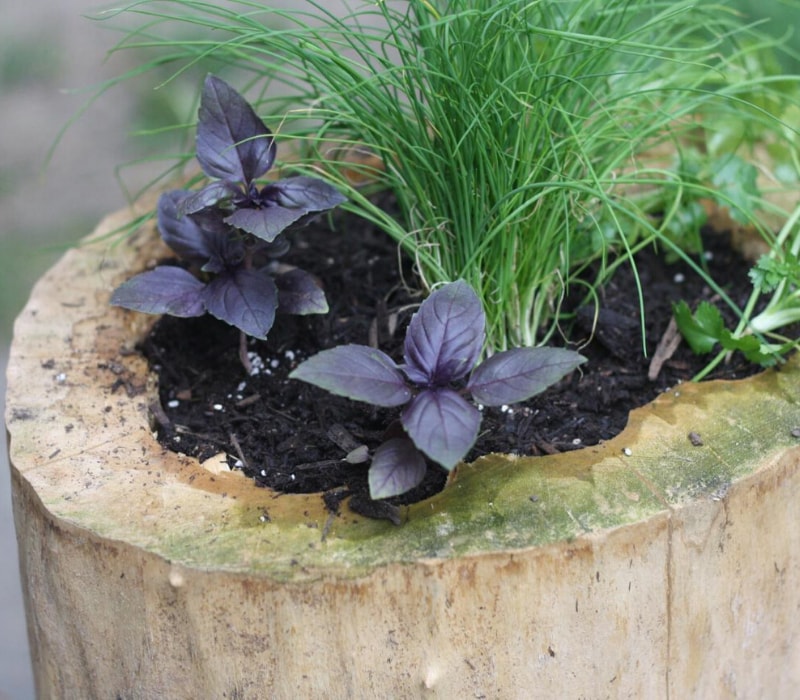
Tree Trunk Planters

DIY Network

If you have a tree trunk or a fallen tree in your yard, don’t just chop it up and put it in the wood chipper.

Re-use it as a natural planter for some pretty flowers. It’s an easy and clever way to add color to your garden

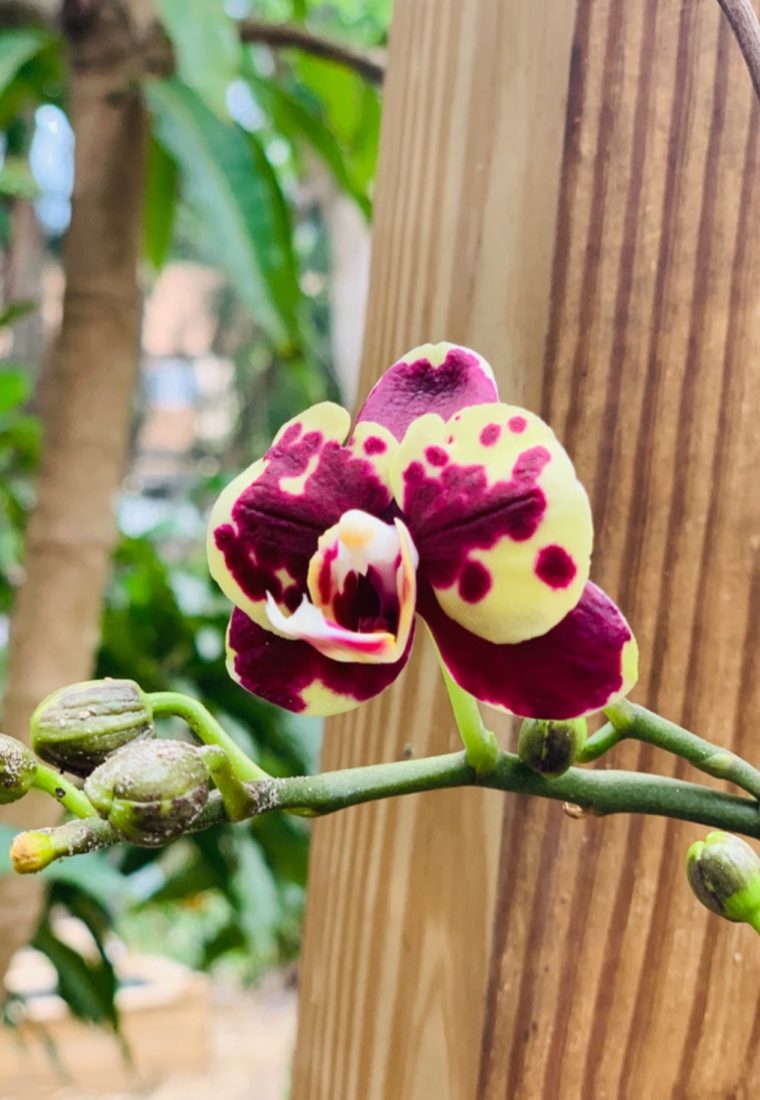
How To Successfully Grow Orchids By Forgetting About Them

I figured that title would bring you this way but it’s most definitely the case here.

I heard orchids are hard to grow but I’ve neglected this thing and by the time I remember, I just dunk it in the pond to absorb water.

That may actually be every 3 months… yet, here we are… blooms and all.

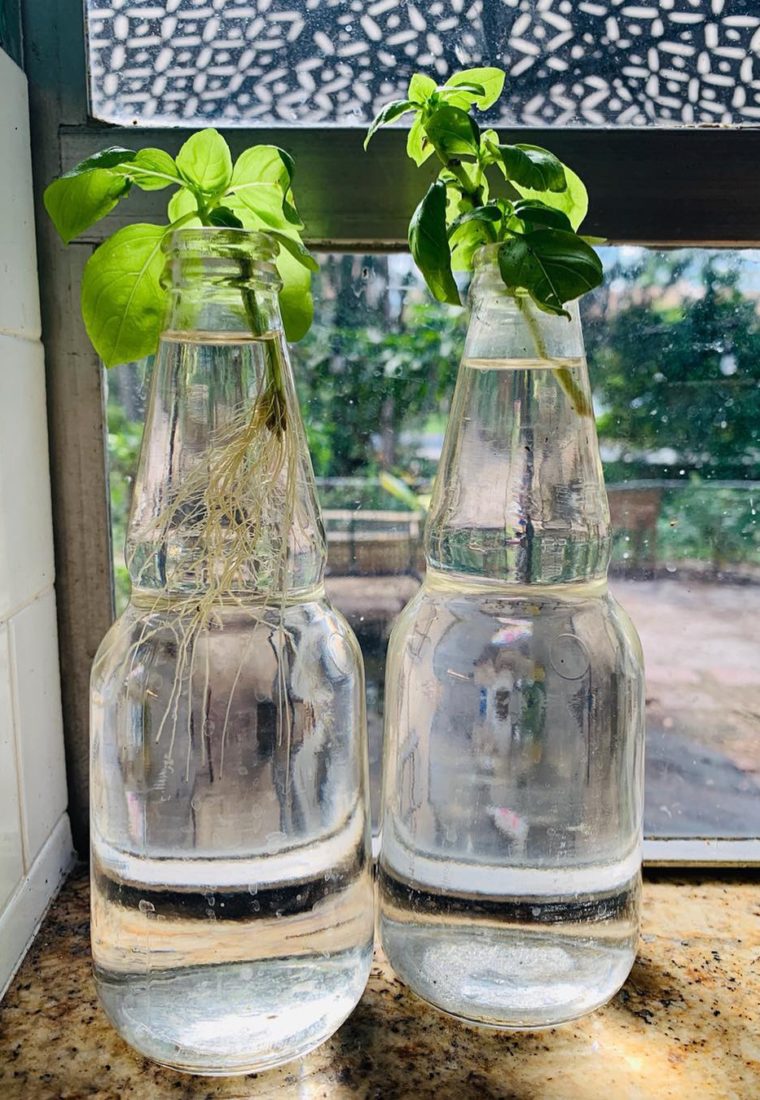
How To Grow Basil Continuously

I love rooting basil. I love the way it looks, I love how easy it is and for some reason, the feeling of constantly being able to keep basil growing makes me happy.

Take a snip of your basil, preferably off the top, set the stem in water (clear glass works best) and place by a window!

Magic will happen. ?

Starting Plants in Used K-Cups Using The Old Coffee Grounds

Even though making a commitment to homesteading and a more self sufficient lifestyle can be a lot of work, I still can be a bit of a creature of convenience. Look, I am like you and would love to see less waste in packaging and less plastics used altogether for daily items, but also my lifestyle requires me to be on the go almost all of the time. I have to find the balance.

When it comes to those “must-have items” that are a little outside of the scope of sustainable packaging, I like to reuse when ever possible and recycle as much as possible.

This brings me to the argument I had with myself about justifying the use of k-cups in their single use, plastic packaging.

I racked my brain as much as I could to think about how I could reuse them, and the best I could come up with was opening them and using the small bit of coffee as fertilizer for my plants.

Then it dawned on me, though coffee itself is usually too acidic to grow plants in, once the coffee grounds have been used and hot water ran through them they actually become pretty neutral of a ph.

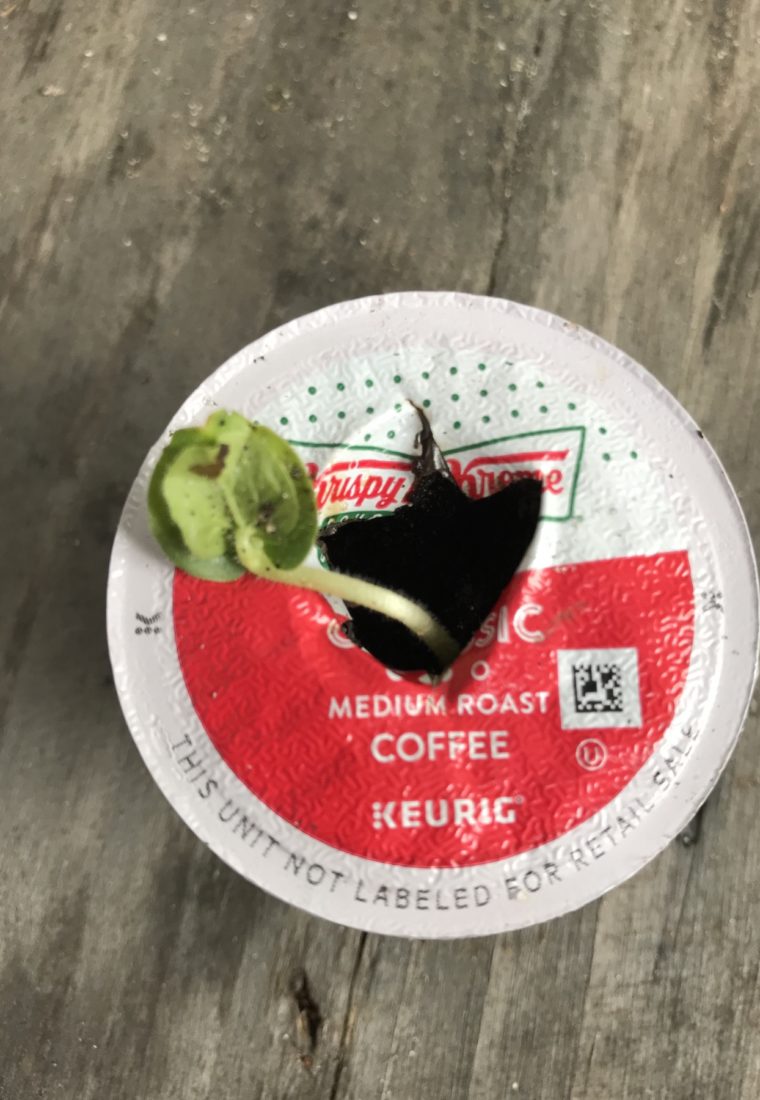
I looked at my #kcups and was able to solve the problem of how to reuse them by also solving my problem of finding a good place to start my seedlings before planting them in my larger garden.

The k-cups were the perfect size so I literally just used my thumb to poke a larger hole, tossed some seeds in the hole and watered daily. I wasn’t sure how well it would work until I started to see all of my planted seeds sprout.

So that brought me to the way I can finally reuse the K-cups successfully, and start my seeds. It’s a win/win, and as my inspiring sister at the eco-conscious consumer has taught me, every bit counts!

Is The Wild Coffee Bush Edible?

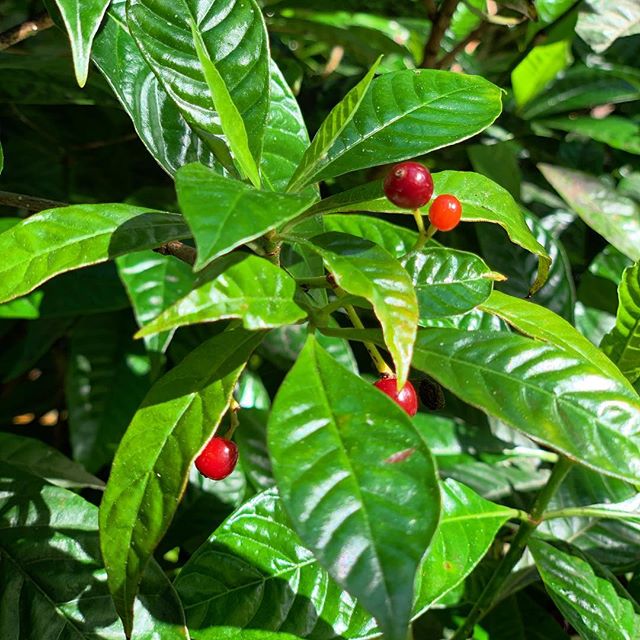
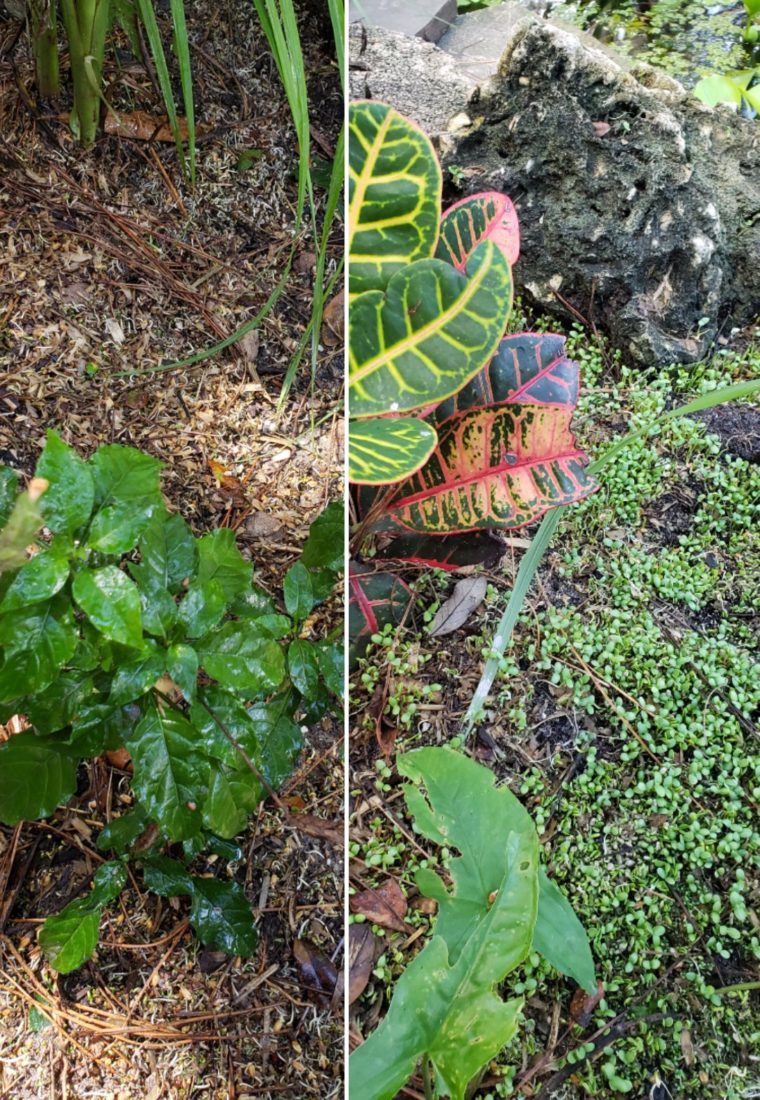
First, yes it’s edible, sort of. This is the Wild Coffee bush, or Psychotria nervosa.

You can eat the pulp off the seeds and even use the seeds to make a “brew” of sorts, but that’s where the word coffee ends for this plant.

It contains no caffeine and the brew is musty and can give you a headache. This is a native Florida plant, a favorite to birds like cardinals, mockingbirds and even swallowtail butterflies.It’s a pretty plant, though edible, I wouldn’t eat it, and doesn’t have much to do with coffee at all.

Some of its relatives have medicinal value, others are hallucinogenic, this one is stick to leaving as an ornamental.

First, yes it’s edible, sort of. This is the Wild Coffee bush, or Psychotria nervosa. You can eat the pulp off the seeds and even use the seeds to make a “brew” of sorts, but that’s where the word coffee ends for this plant. It contains no caffeine and the brew is musty and can give you a headache. This is a native Florida plant, a favorite to birds like cardinals, mockingbirds and even swallowtail butterflies.It’s a pretty plant, though edible, I wouldn’t eat it, and doesn’t have much to do with coffee at all. Some of its relatives have medicinal value, others are hallucinogenic, this one is stick to leaving as an ornamental.

Chicken-Proofing Your Garden

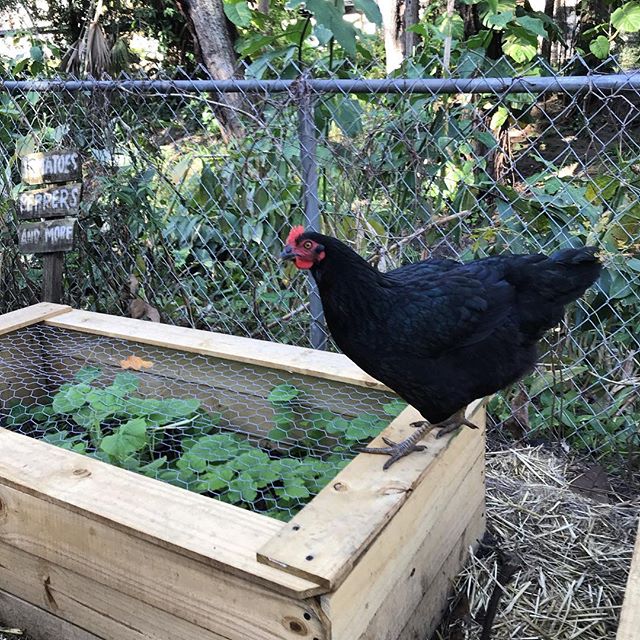
A quick $20 and 5 minutes, I turned the garden boxes into an actual space. I didn’t just use straw, I used a straw blanket with small netting and stakes to keep it in place.

Why you ask? CHICKEN PROOF.

They don’t want to dig through mesh so area around our garden can be protected and not washed away into the creek behind us. Also, my husband made chicken wire lids for the boxes to keep the chickens from eating everything.

Certified Wildlife Habitat

wildlife

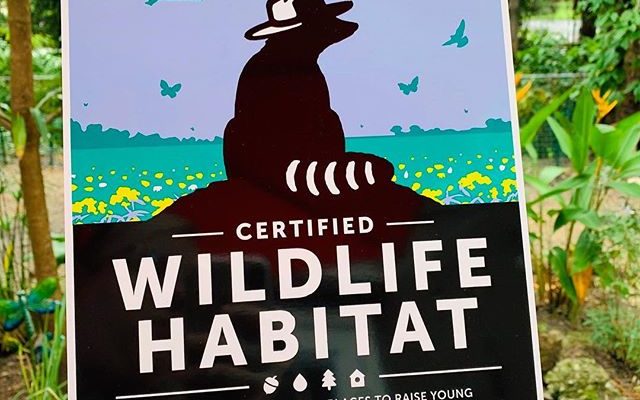
Our homestead has been recognized by the National Wildlife Federation along with the Florida Wildlife Federation as a Certified Wildlife Habitat. We achieved certification by creating gardens that offer food, water, cover and places to raise young for wildlife and maintaining them in a natural, sustainable way.

We were able to achieve this largely in part due to my husband’s hard work on our natural pond, our herb & vegetable garden, amble fruit trees, converting our shed into a coop and also raising free-ranging chickens and ducks organically which provide food for friends and family.

Quickly Create Your Own Luscious Green Garden (perfect chicken forage mix)

I used to hate the dirt and lack of grass that was once our backyard. Once we got chickens, I knew I needed to come up with creative ways to keep things green, seriously.

I went on Amazon and bought my trusted seeds to mix together for the perfect foraging ground cover that starts to germinate within hours.

This is what I purchased:

Chicken Forage Feed Seed Blend, Non-GMO, 5 lbs.

Outsidepride Red Clover Seed: Nitro-Coated, Inoculated – 5 LBS

Certified Organic Non-GMO Wheatgrass Seeds – 5 Pounds Wheat Seed – Guaranteed to Grow

Outsidepride White Dutch Clover Seed: Nitro-Coated, Inoculated – 5 LBS

Once the seeds arrived, I mixed them together and threw them EVERYWHERE. By that evening, the ground looked like this:

Next morning:

Within 24 hours of taking the left photo, you can see how much things have sprouted:


I swear by this stuff and there’s no denying that it works.

4 Things We’ve Learned So Far

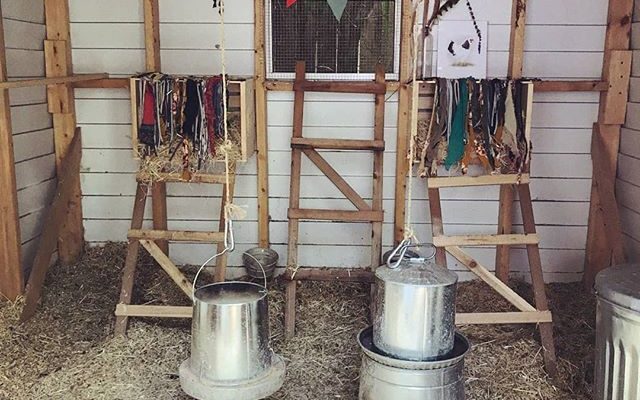
1. Chopped straw vs pine shavings in the coop has proven to be a great experiment. I didn’t know what to expect but I’m super excited to report that the chopped straw seems to stay cleaner longer and has been much easier to spread around..

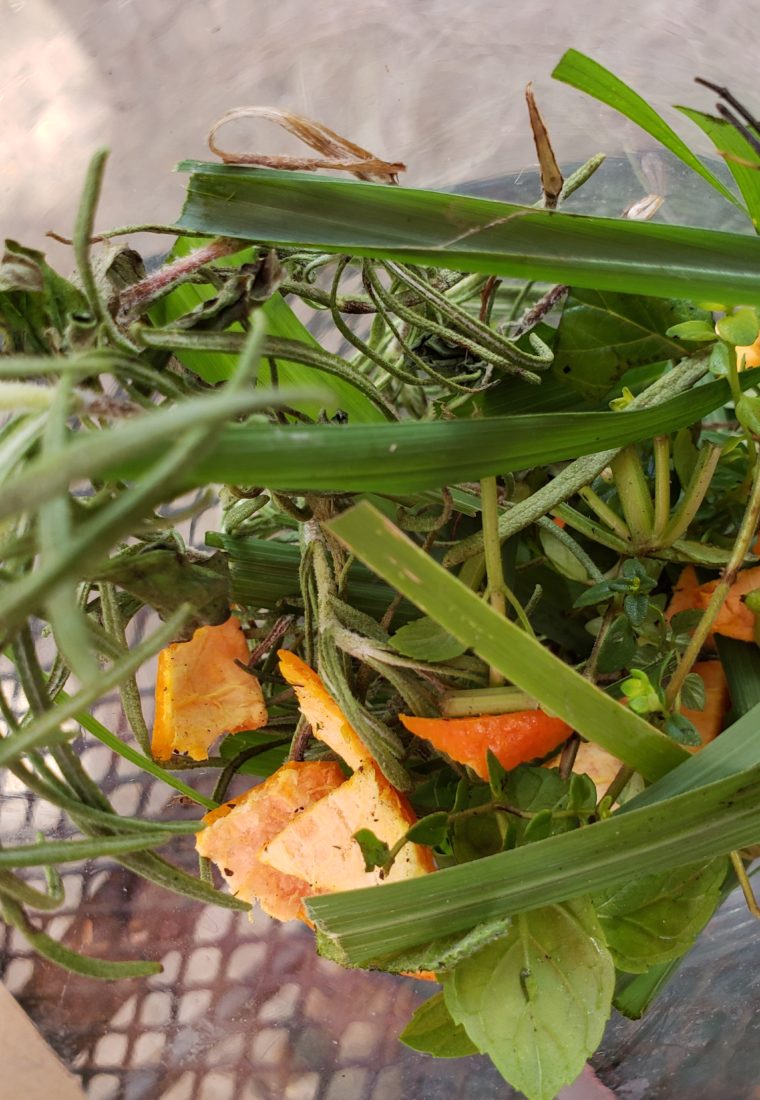
2. Peppermint is a wonderful thing to grow in the garden, especially when you have chickens. Certain plants (like peppermint) will spread and take over. I use it daily in the coop, for the chickens to snack on and also, to freshen up the coop. Planting a small above ground garden in a tub, box, etc.. with herbs like Rosemary, Thyme, Peppermint, Lavender will be your coop cleaning friend.

3. If you decide on chickens, go big or go home. Within 3 months, we had moved the chickens from the small coop we had, into our shed (more about shed coop on the blog). It doesn’t matter how fancy it is, you’ll soon realize that you’ll want more space. There are so many options, it might even be worth it to build your own.

4. Chia, flax, clover and wheatgrass are great to grow around your yard, especially when you have chickens. They will forage and get extra nutrients from these things but they’re also super easy to get going, they sprout within a few days and provide awesome ground cover.

So there you go… thanks for following us 🙂

Growing Herbs To Benefit Your Chickens & The Coop

You may wonder why I collect herbs daily for the chickens... so let me take a second to explain the benefits of each:  rosemary - assists with pain relief and enhancing respiratory health, it's also a great natural insecticide.  basil – great antibacterial, mucous membrane health, smells lovely.  lavender – helps relieve stress, can also increase blood circulation, great coop cleaner, insecticide  marigolds – great stress reliever, increases blood circulation, aromatic, insecticide, helps produce colorful yolks  mint –  insecticide and rodent repellent, antioxidant, aids in respiratory health, wonderful digestive aid, lowers body temperature naturally which can keep the chickens cooler, smells amazing in the coop.  oregano – combats coccidia, salmonella, infectious bronchitis, avian flu, blackhead and e-Coli, strengthens immune system  sage – antioxidant, antiparasitic, general health promoter, wonderful smell. Throw in some other various herbs you have around the garden and your chickens will be happy.

You may wonder why I collect herbs daily for the chickens… so let me take a second to explain the benefits of each:

rosemary – assists with pain relief and enhancing respiratory health, it’s also a great natural insecticide.

basil – great antibacterial, mucous membrane health, smells lovely.

lavender – helps relieve stress, can also increase blood circulation, great coop cleaner, insecticide

marigolds – great stress reliever, increases blood circulation, aromatic, insecticide, helps produce colorful yolks

mint – insecticide and rodent repellent, antioxidant, aids in respiratory health, wonderful digestive aid, lowers body temperature naturally which can keep the chickens cooler, smells amazing in the coop.

oregano – combats coccidia, salmonella, infectious bronchitis, avian flu, blackhead and e-Coli, strengthens immune system

sage – antioxidant, antiparasitic, general health promoter, wonderful smell.

Throw in some other herbs you have around your garden and you’re good to go.

DIY Natural Duck Pond (no chemicals, pumps) with progress photos

Swipe for gradual pond progression. It's only been a few weeks... I never thought having a pond would be so peaceful. I've asked my husband to write a little post about it for those interested in doing the same. Stay tuned.

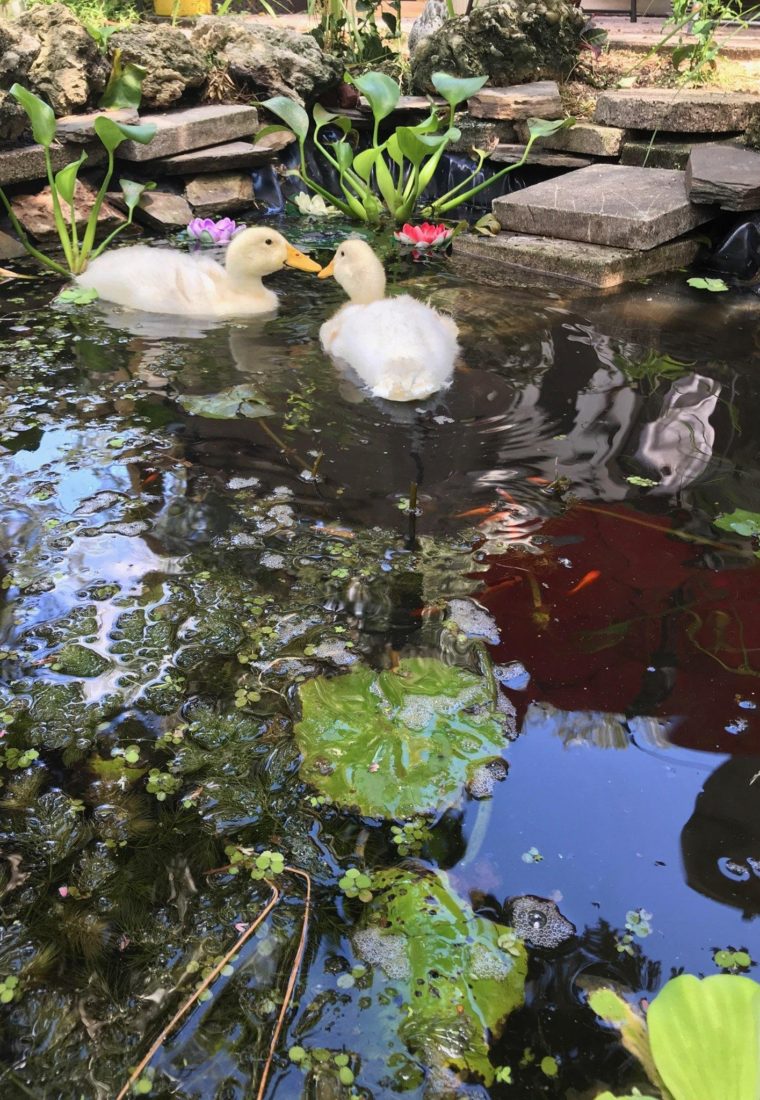
First we got chickens, and the chickens needed a coop. So we turned our shed into a coop. When we got ducks though, what they really needed was a nice and natural pond.

After doing a little research, I learned there are many types of ponds that you can build yourself, much easier than I had imagined also. Somewhere in the search for inspiration, I decided that making the pond as natural as possible would fit our homestead lifestyle much better than installing pumps and waterfalls and using artificial chemicals to keep the water clean.

A natural pond not only spoke to our lifestyle but also kept in line with our low maintenance creed.

If you’re thinking about a pond, it’s as simple as starting to dig, and that’s exactly what I did. I picked out the spot, roughed in the shape and started to dig. I took out some rocks, and a few roots but mainly just started to dig. I wanted to go down a little bit further than the maximum depth I wanted to make up for the liner and under-liner material, and I wanted some areas deeper than others, so keep that all in mind as you dig.

Once I got the shape and depth, I dropped in some old carpet pieces to protect the liner from any roots that might try to puncture it, then followed that with the liner. I tried the best I could to make the liner smooth to the kidney shape we dug. The liner overlapped some on the soil and I kept it in place with some rocks around the border.

After this, I filled it up with water, and that was the last time other than topping off here and there I’ve had to add water. It’s mostly now filled by rainwater.

As far as a “natural pond” goes, plants are your filter so choose them carefully. There are plenty of plants that help, but I think looking at actual natural ponds helps to give you an idea what plants grow in your area and which ones help sustain a natural aquatic biome. If you’re lucky you can forage some for yourself and cut the costs.

Another concern was mosquitos, this easily was addressed by adding guppies, mosquito fish, and goldfish. They kept the water moving a bit and actually eat the mosquito larvae.

Simple additions like little solar fountains or sprinklers can help keep the water moving to discourage mosquitos also and help oxygenate the water some.

Lastly, make it your own! Plant around the edges, add solar lights, enjoy larger fish like koi, or just enjoy the natural aquatic pondscape you’ve made and the local plants you’ve foraged.

Here are some progression photos:

It can be as simple or as difficult as you like, but with my creed of simple being better, a natural pond is a fun, creative way to make the most out of your backyard or property and yes, the ducks love it!

Easy Backyard Fire Pit

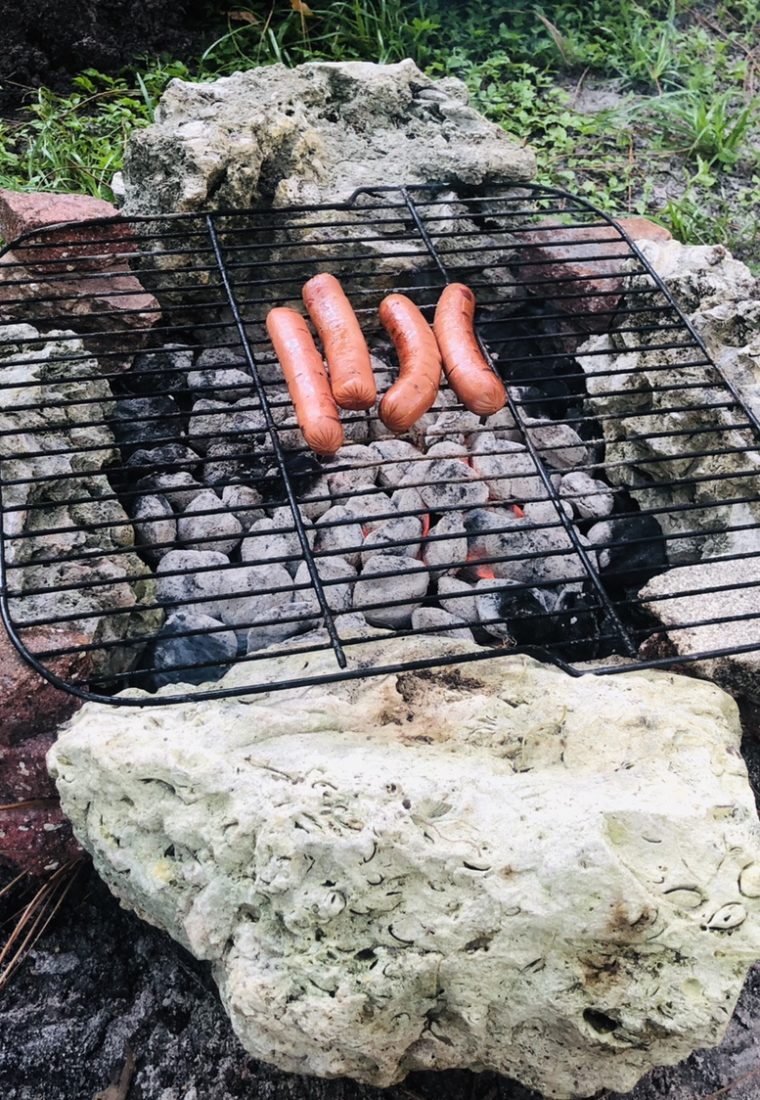
Easy to make, dig a hole and put a grate over it. Cover with charcoal and surround by large rocks. Place second grate over the rocks and light it up.

That’s about it.