Tag: Cooking

Time-Tested Methods for Food Preservation

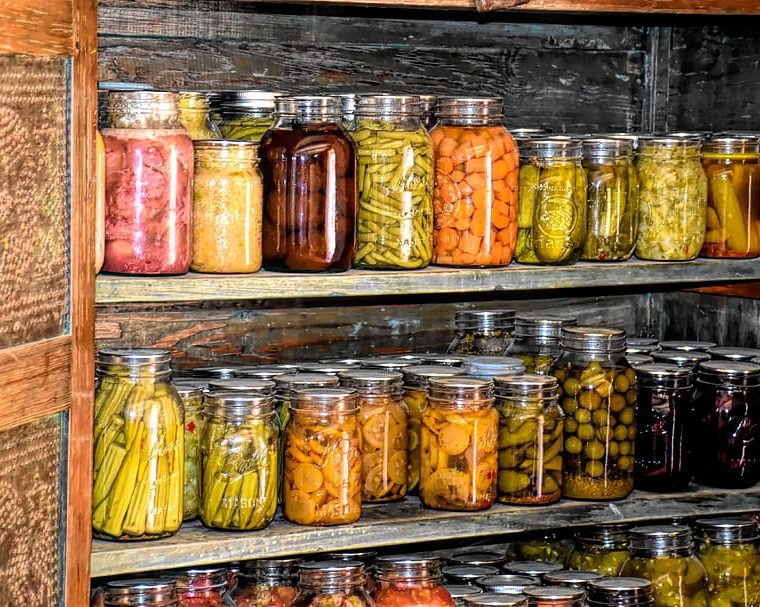
Raising crops and animals on your homestead takes a lot of time and effort–not to mention blood, sweat, and tears. Don’t let your produce go to waste because of improper Preservation.  Luckily there are a number of ways to preserve your produce or purchase. Here are Time-Tested Methods for Food Preservation:

1. Dehydrating

One of the oldest methods of food preservation is dehydration. Using an oven at a low temp or through the use of a specialized kitchen or solar dehydrator is a great way to remove moisture and dehydrate food. This stops potentially dangerous microorganisms. It is also an excellent way to preserve nearly any food source for a long period of time.

2. Freezing

This is one of the most popular methods of long-term food preservation, due to the ease and minimal prep work involved. A large chest freezer can hold enough food to hold over an average family for months. With proper vacuum sealing meats and produce can be frozen for up to a year or more without loss of quality. 

4 of the Most Useful Homesteading Skills to Learn This Winter

Winter is the perfect time to learn new homesteading skills. Cold temperatures and limited daylight keep most people inside for much of the day. So learning new homesteading skills is a great way to benefit from those extra indoor hours. Read on to learn four basic skills that can help improve your homesteading life. 

1. Cooking

If you haven’t already learned to cook from scratch, it’s an essential skill to master. You need to know the basics of scratch cooking to turn next season’s garden harvest into delicious meals. More experienced cooks could learn additional skills like how to bake or how to turn leftovers into new meals.

The best way to learn is to take a cooking class, but you can also get some basic cookbooks and just jump right in, as well. Choose a couple of recipes you would like to make, gather your ingredients and read through the entire recipe before starting. 

2. Fiber Arts

Do your homestead dreams include making your own clothes, creating beautiful gifts, or raising fiber animals? Learning to sew, knit, or crochet is the first step toward turning those dreams into reality. Taking a local class gives you a chance to learn a new skill and make new friends. If there isn’t a convenient class, it’s not hard to find online tutorials for these skills.

3. Gardening

Unless you’re indoor gardening, you’ll have to wait until spring to put into practice what you learn about gardening during winter. New gardeners may want to learn how to:

  • Plant a raised bed
  • Choose plants for their growing zone
  • Decide where to plant garden beds
  • Deter pests
  • Create a compost pile

For those of you who are familiar with the gardening basics, you may be interested in learning to build something that will enhance your gardens, like a tomato trellis or simple greenhouse.

4. Woodworking

For those who didn’t take shop class in high school, even basic woodworking skills may seem intimidating. But you needn’t be afraid. Woodworking isn’t difficult once you learn the basics, like working with the grain and how humidity affects wood. Learning to cut properly and safely comes next. With a little information, you’ll be cutting perfect miter joints before spring arrives.

These four basic homesteading skills will take you a long way in your journey towards self-sufficiency. Whether you learn one skill or all of them, each is a great way to spend those cold winter months indoors. 

Top Five Reasons You Should Be Eating Duck Eggs

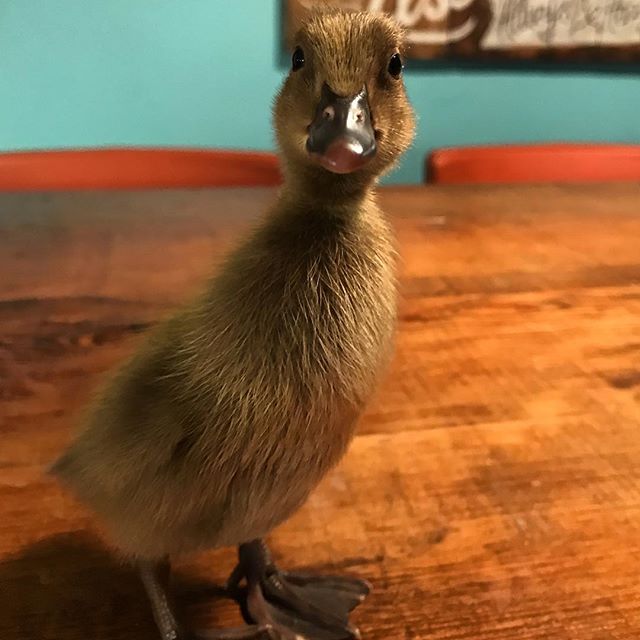
1. Duck eggs are healthier. The number one reason you should be eating duck eggs are that they are healthier. Now we all know the value of the “incredible, edible” chicken egg, but did you know that duck eggs are higher in essential vitamins and minerals? The free range ducks seem to have the highest quality of eggs, duck eggs in general have more vitamins and minerals including vitamin A, B6, B12, Niacin, firemen, riboflavin, pantothenic acid, folate, and retinol. Not to mention they have a higher protein content! Whew!

2. Duck eggs have more Vitamin D. Especially if your ducks free range, duck eggs have more vitamin D than a chicken egg. Vitamin D has a long list of benefits including skin and bone health as well as some evidence that it improves your mood.

3. Duck eggs are the special ingredient in many Baker’s products. Did you know that duck eggs make for a fluffier cake, a lighter cookie, and a moist and delicate addition to most bakery items? The higher protein content in the egg whites of a duck egg make them a fantastic choice for baking.

4. More omega-3’s! By now most people know how important omega threes are, but still many people don’t know how to add them to their diet without supplements. Omega-3’s help keep your heart healthy and may reduce inflammation in the body. Inflammation is generally understood by scientists to be a potential cause for many diseases. Also there is a link to omega three consumption and it’s positive affect on mood.

5. Lastly, I truly believe duck eggs are the food of the future. Ducks are a very easy animal to care for. Their feed is simple, their needs are basic, and they are consistent layers as chickens generally have months where production slows down. The thicker shell of a duck egg makes them last longer than chicken eggs, and their unique make up generally allows them to be a suitable substitution for those with chicken egg allergies.

Easy Cast Iron Skillet BBQ Meatballs

Quick, easy, hearty and delicious, these skillet cooked BBQ meatballs are sure to be a family favorite.

Ingredients:

1lb ground beef

1/2 cup chopped red onion

1/4 cup shredded cheddar cheese

1 egg

2 cloves minced garlic

Salt and pepper to taste.

1 cup BBQ sauce

1/4 cup orange juice

Directions:

1. Combine all ingredients (except bbq and orange juice) and shape into 1 inch balls.

2. Cook at 375 for 30 minutes in a well seasoned and oiled cast iron skillet.

3. Douse in (about 1 cup) of your favorite BBQ sauce mixed with 1/4 cup orange juice and allow to simmer for a few minutes until sauce is warm.

4. Serve hot!

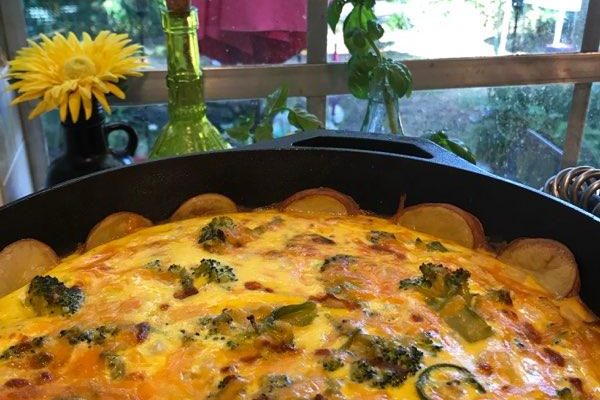
Garden Fresh Breakfast Quiche

This hearty quiche is only accidentally vegetarian. It’s so good, I never add any meat because it’s filling enough without it.

Recipe below:
Garden Fresh Breakfast Quiche

INGREDIENTS

1 1/2 cup broccoli florets, chopped

1 medium onion, chopped

3 minced garlic cloves

5-6 basil leaves

1 diced jalapeño

4 red potatoes, thinly sliced

1 cup cheddar cheese

1⁄4 cup milk

1⁄2 cup sour cream

6 eggs

1/4 cup salsa

salt and pepper to taste

grated parmesan cheese

DIRECTIONS

1. Preheat oven to 375°F.
2. Line the bottom of your seasoned cast iron skillet with the potato slices.
3. Place in oven for now.
4. Sauté onions and garlic, then add broccoli florets, jalapeños, basil, salt and pepper.
5. Whisk together the cheese, milk, sour cream, salsa, and the eggs in a large bowl.
6. Mix in the sautéed vegetables.
7. Pour into skillet.
8. Sprinkle more cheese and Parmesan on top.
9. Bake for 45 minutes or until eggs reach desired consistency. *Other options include topping with tomatoes and basil or adding your favorite breakfast meats.

Enjoy!

Grilled Bruschetta BLT

It’s almost midnight, so here’s our late night snack!

Ingredients:

4 Campari tomatoes

1/2 cup fresh basil leaves

2 garlic cloves

1/2 small red onion

1 tbsp olive oil

6-8 slices bacon

8 slices Italian bread

Balsamic vinegar

4 slices provolone

Lots of butter

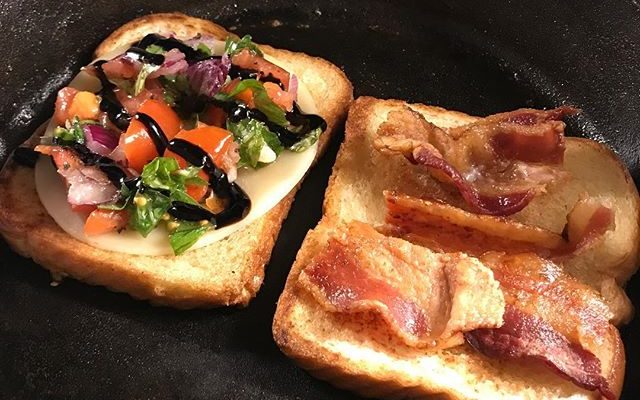
Directions: Start cooking your bacon. I prefer in the cast iron, in the oven at 350 until your preferred doneness. Dice up tomatoes, basil, garlic, and red onion, toss with olive oil in a small bowl and set aside. Grill your bread in a hot cast iron with lots of butter. Place a slice of provolone onto a piece of the grilled bread, top that with the mix, drizzle with balsamic, add two slices of bacon and top with second piece of grilled bread.

Grilled Bruschetta BLT. It’s almost midnight, so here’s our late night snack!Ingredients: 4 Campari tomato’s1/2 cup fresh basil leaves2 garlic cloves1/2 small red onion1 tbsp olive oil6-8 slices bacon8 slices Italian bread Balsamic vinegar4 slices provoloneLots of butter Directions: Start cooking your bacon. I prefer in the cast iron, in the oven at 350 until your preferred doneness. Dice up tomatoes, basil, garlic, and red onion, toss with olive oil in a small bowl and set aside. Grill your bread in a hot cast iron with lots of butter. Place a slice of provolone onto a piece of the grilled bread, top that with the mix, drizzle with balsamic, add two slices of bacon and top with second piece of grilled bread. Do this til’ you’ve made all the sandwiches you want.

Do this til’ you’ve made all the sandwiches you want.